What is a Modern Data Stack
in Blog

A Modern Data Stack (MDS) is a stack of technologies that makes a modern data warehouse perform 10–10000x better than a legacy data warehouse. Ultimately, an MDS saves time, money, and effort. The four pillars of an MDS are a data connector, a cloud data warehouse, a data transformer, and a BI & data exploration tool.
Easy integration is made possible with managed & open-source tools that pre-build hundreds of ready-to-use connectors. What used to take a team of data engineers to build and maintain regularly can now be replaced with a tool for simple use cases. Managed solutions like Stitch and Fivetran, together with open-source solutions like Airbyte and Meltano, are making this happen.
Using a cloud-based columnar data warehouse has been the trend recently due to its high performance and cost-effectiveness. Instead of paying $100K per year for an on-premise MPP (massively parallel processing) database, you can start paying from $100 (or less) per month. Cloud-native data warehouses are said to be 10–10000x times faster than a traditional OLTP. Popular options in this category are BigQuery, Snowflake, and Redshift.
In the old day, processing data inside the data warehouse was the bottleneck due to the technology’s limitation. As a result, companies had to favor ETL instead of ELT to reduce the workload of the data warehouse. With the advancement of cloud-native data warehouses, however, many in-data-warehouse transformation tools are becoming popular. Most notable in this category are dbt (data build tool) and Dataform.
BI tools used to take care of some transformations to reduce the workload on legacy data warehouses too. However, with the modern data stack, BI tools’ focus has been shifted (in my opinion) to democratize data access, self-service, and data discovery. Some tools that I think are heading in the right direction are Looker, Metabase, and Superset.
Our architecture
Getting started with the Modern Data Stack can be daunting as many different tools and processes are involved. This article aims to help you get started on this journey as seamlessly as possible. There are many preparation steps, but it only takes five minutes to spin up all resources once you are done.
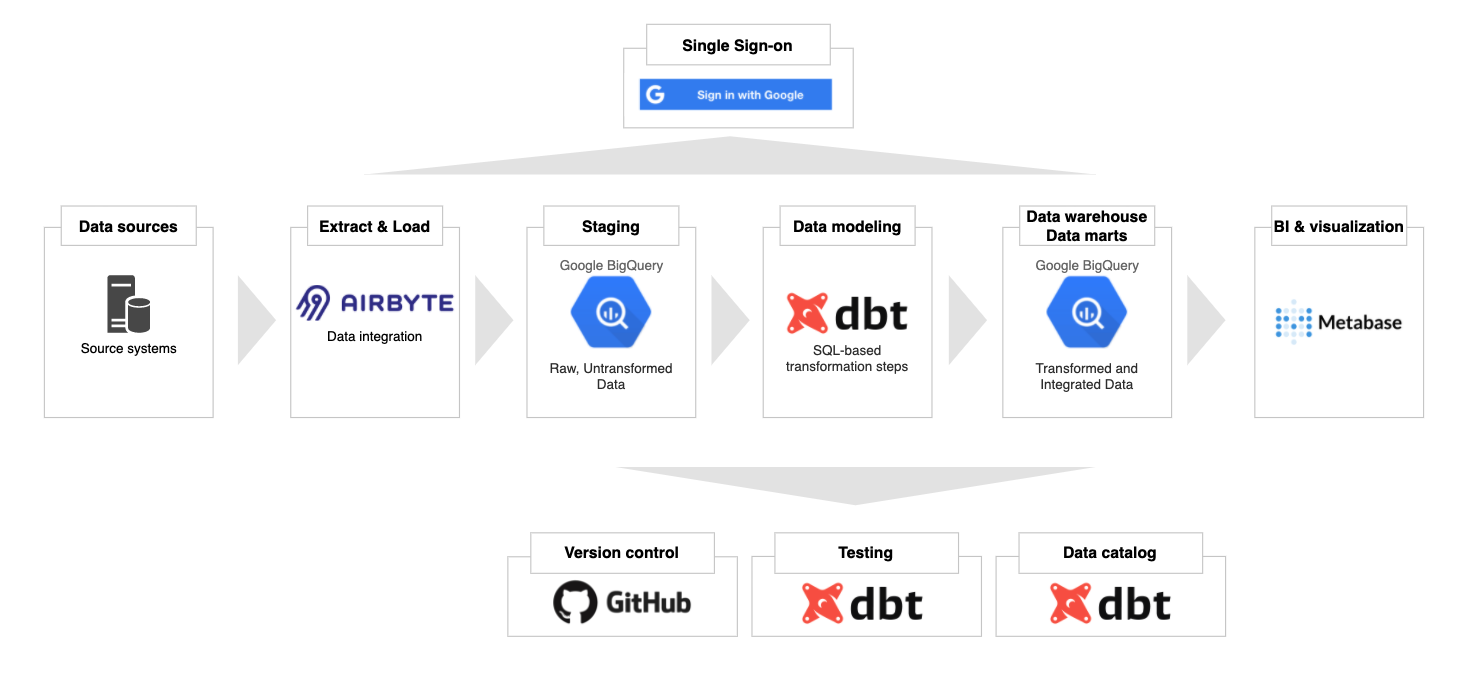 A Modern Data Stack Architecture (image by author)
We will be using Terraform, an infrastructure-as-code open-source tool to provision everything in Google Cloud. If you follow the instructions below, here are the resources that will be created.
A Google Cloud project with the necessary API enabled
Ingestion: a GCE instance running Airbyte
Warehousing: BigQuery datasets
Orchestration (optional): a GCE instance running Airflow
BI & data discovery: a GCE instance running Metabase
Service accounts for different services & their IAM permission bindings
Get Started
Create a Google Cloud account and enable billing
The Terraform code in this project will interact with the Google Cloud Platform. Therefore, our first step to creating a Google account and enable billing. Note the billing ID with the following format in the Billing Page: ######-######-######. You will need this value in the next step.
Install Google Cloud CLI
Install Google Cloud SDK following the instructions here for your respective OS. After you have the gcloud CLI installed, run the following command in a terminal window and follow the instructions. This will let Terraform use the default credential for authentication.
gcloud auth application-default login
Install terraform
Follow the instructions here to install the Terraform CLI locally. Run the following command afterward to check your installation:
terraform -v
You should see something like this:
Terraform v1.0.0
on darwin_amd64
+ provider registry.terraform.io/hashicorp/google v3.71.0
Fork or clone this repo locally
You can fork this repo to your account or clone it to your local machine. To clone the repo, run the following:
git clone https://github.com/tuanchris/modern-data-stack
cd modern-data-stack
Create a terraform.tfvars file
Create a terraform.tfvars file with the following content:
# The Billing ID from the first step
billing_id = ######-######-######
# The folder ID of where you want your project to be under
# Leave this blank if you use a personal account
folder_id  = ""
# The organization ID of where you want your project to be under
# Leave this blank if you use a personal account
org_id     = ""
Warning: These are considered sensitive values. Do not commit this file and the *.tfstate files to a public repo.
Customize the values in variables.tf
The variables in variables.tf will be used for the configurations of the resources. At the very least, change the value for project_id to a globally unique value of your choosing.
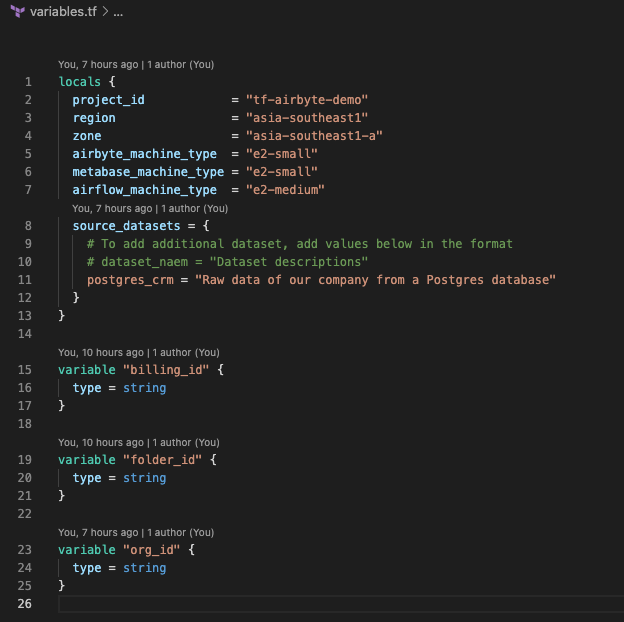
Image by author
You can customize the machine type for different services by changing the variables. If you don’t want to use any service, comment it out in the gce.tf file.
You can also create different datasets for your source systems by adding them to the sources datasets dictionary.
Create a modern data stack
Finally, to provision all these resources on Google Cloud, run the following command:
terraform apply
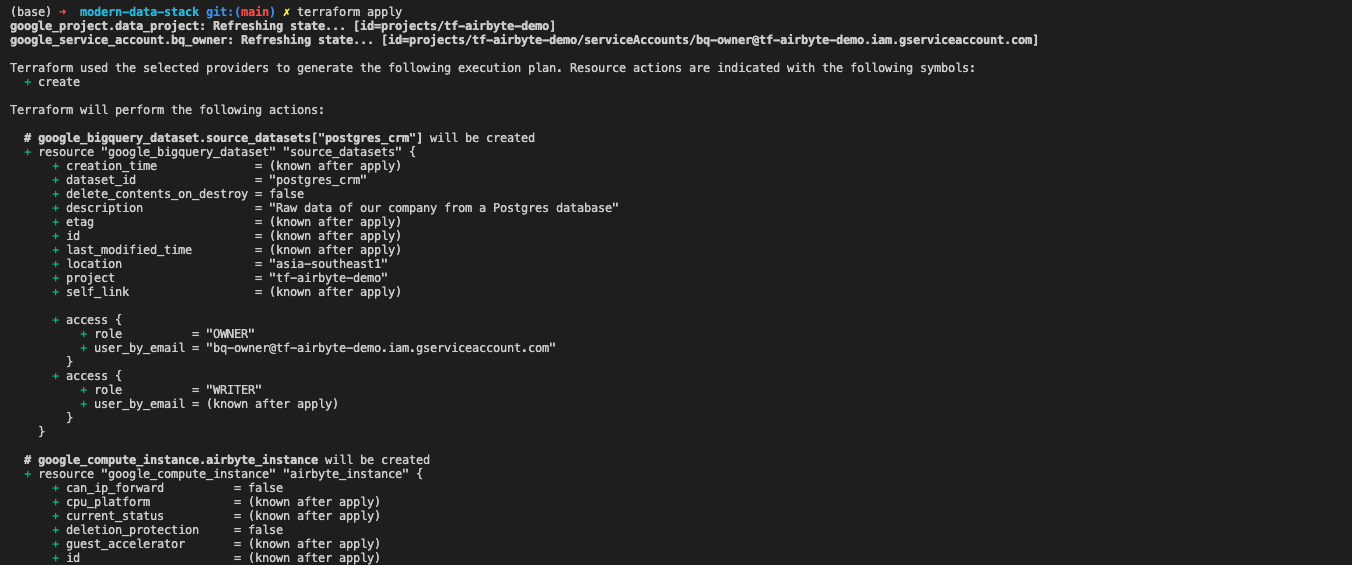 Image by author
Study the output in the terminal to make sure that all resource settings are what you want them to be. Type yes and hit enter.
Terraform will create a Google Cloud project with our modern data stack. The whole process will take about 2–3 minutes. It takes an additional 2–3 minutes for the services to be installed on VM instances. The whole process will only take 5 minutes or less.
Using the modern data stack
Retrieve service accounts for different services
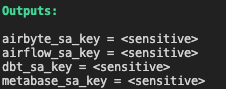
Image by author
Google recommends using a different service account for different services. The terraform code in the project has created different accounts for different technologies used already. To retrieve a service account for a particular service, run the following command:
terraform output [service_name]_sa_key
The default permission for all these accounts is roles/bigquery.admin. You can customize this in the iam.tf file.
The value you got back is base64 encoded. To turn this value back to the JSON format, run the following command:
echo "[value from the previous command]" | base64 -d
You can use the JSON service account to authenticate the service access to your project’s resources.
Warning: Anyone with this service account can access your project.
Ingest data with Airbyte
Airbyte is an excellent open-source data integration tool. To access the Airbyte UI, first, get the gcloud SSH command.
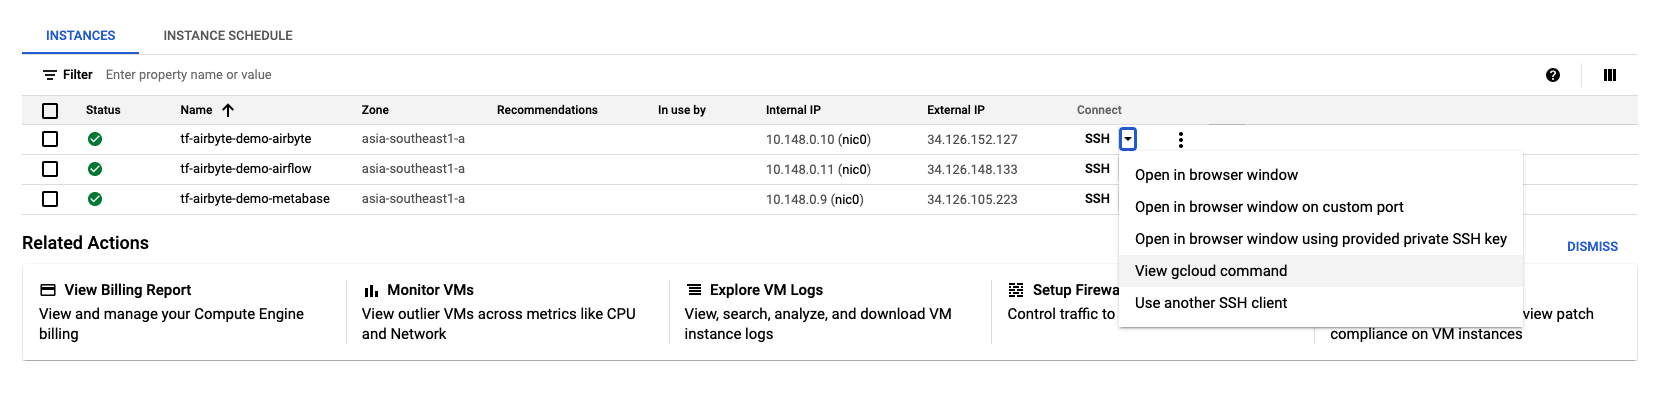 Image by Author
You will get a command similar to this: gcloud beta compute ssh –zone “asia-southeast1-a” “tf-airbyte-demo-airbyte” –project “tf-airbyte-demo”. Next, add the following to the command to port-forward the Airbyte UI locally: – -L 8000:localhost:8000 -L 8001:localhost:8001 -N -f. Your final command will look like this:
gcloud beta compute ssh --zone "asia-southeast1-a" "tf-airbyte-demo-airbyte" --project "tf-airbyte-demo" -- -L 8000:localhost:8000 -L 8001:localhost:8001 -N -f
Note: Be sure to delete the newline character after copying from the GCP UI.
If the Airbyte instance has finished starting up, you can access it by going to your browser and visit localhost:8000. If not, wait five minutes for the instance to complete the installation.
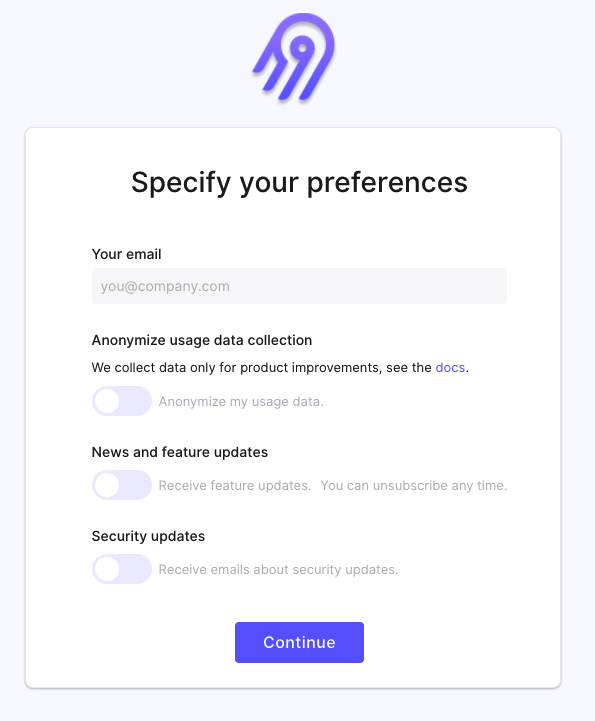
Image by author
Now you can integrate your sources, add a BigQuery destination using the airbyte_sa_key, and have your data in BigQuery in no time.
You can access the Airbyte installation at /airbyte/ inside the VM.
Model data with dbt
dbt (data build tool) is a powerful open-source data transformation tool using SQL. It enables Data Analysts to do the work previously reserved for Data Engineers. It also helps create an entirely new position called Analytics Engineer, a hybrid of a Data Analyst and a Data Engineer. You can read more about the position in my blog here.
 Image by author
Unlike Airbyte, Airflow, and Metabase, you don’t need a server to run dbt. You can register for a free (forever) 1-seat account by visiting their website.
Orchestrate workflow with Airflow
Airflow is a battle-proven workflow orchestration tool created by Airbnb. With a modern data stack, hopefully, you won’t have to use Airflow a lot. However, in some cases where some customization is needed, Airflow can be your go-to tool.
To access the UI, get the SSH command similar to the above section with Airbyte. Use the following command for port-forward:
gcloud beta compute ssh --zone "asia-southeast1-a" "tf-airbyte-demo-airflow" --project "tf-airbyte-demo" -- -L 8080:localhost:8080 -N -f
Now you can access the Airflow installation at localhost:8080. The default username & password are admin and admin.
 Image by author
You can access the airflow installation at /airflow/ inside the VM.
Visualize data with Metabase
Metabase is an open-source data visualization and discovery tool. It is super user-friendly and easy to get started with.
To access the Metabase UI, get the SSH command similar to the above section with Airbyte. Then, use the following command for port-forward:
gcloud beta compute ssh --zone "asia-southeast1-a" "tf-airbyte-demo-metabase" --project "tf-airbyte-demo" -- -L 3000:localhost:3000 -N -f
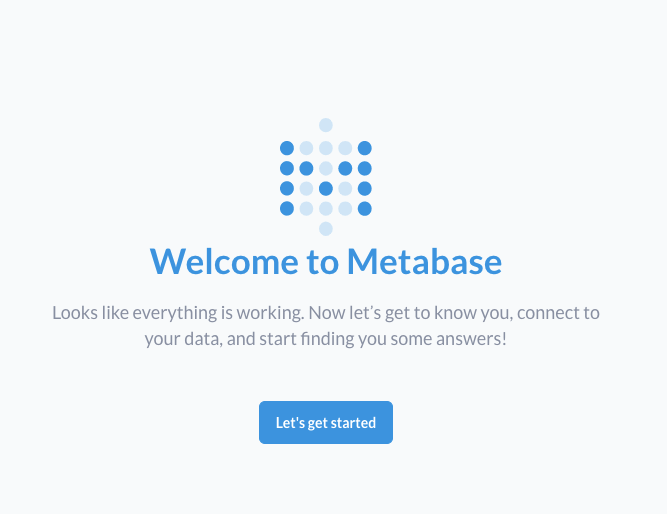
Image by author
Clean up
To avoid any unwanted cost incurred, be sure to clean up the resources created in this project by running.
terraform destroy
Warning: This will delete any persisted data and resources in the project. Alternatively, you can turn off the unused GCE to save costs as well.
Conclusion
I hope that this article helps you understand the Modern Data Stack better and/or motivates you to start on this journey.
Feel free to reach out to me for feedback/questions.
Happy learning!